 on 5 September 2026
 Financial Proposals
Managing Financial Proposals in Dolibarr

This module adapts DoliPlus’ commercial proposal to help you create financial proposals. This way, you manage all your financing offers in a single tool.
Additionally, for financial lease contracts, this module manages the financing schedule. You control the entire cycle, from the offer to payment.
For example, the schedule is then used to generate monthly invoices. Indeed, these invoices are paid by direct debit.
Moreover, you process bulk SEPA bank debits. This is automatic, so you save time.
You can also merge monthly invoices. This way, you generate a paper version and send it by post.
Finally, all financial proposal documents are exported in Word format. You can also edit them in Excel if needed.
That’s why this module now connects to DoliPlus’ Office module. This way, you create and edit your attached documents in PDF format.
For example, reports track each step, from the proposal to the invoice, then to payment.
Opening a Financial Proposal (or Quote)
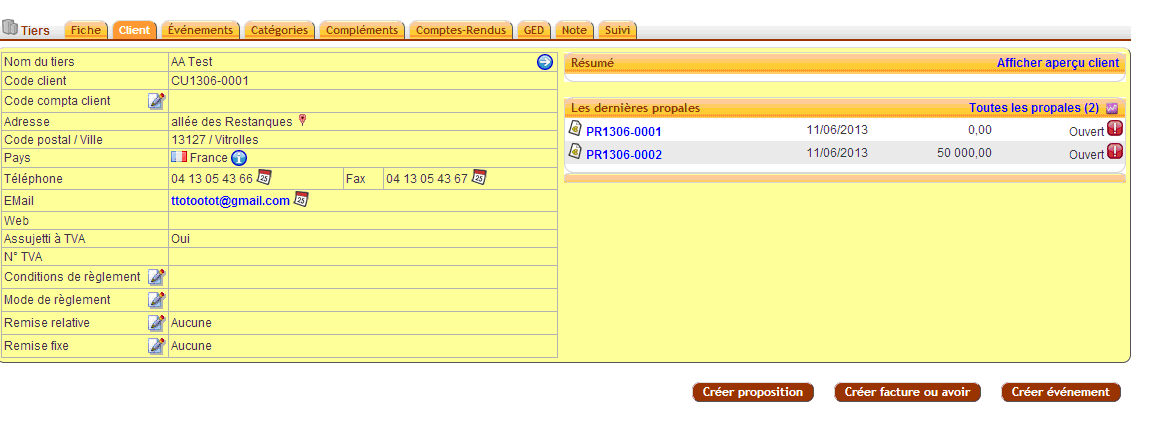
First, open the customer or supplier record, under the “Customer” or “Prospect” tab.
Next, to create an offer, click the “Create proposal” button.
Finally, to open an existing proposal, click on its blue number.
Creating a Financial Proposal
First, when creating, you fill in the first screen:
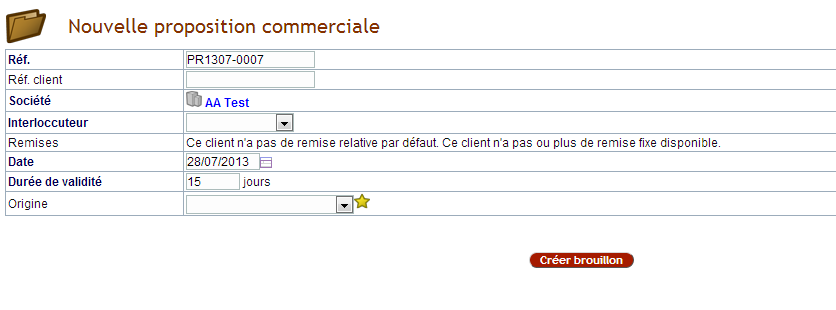
- The customer ref.: the reference belonging to your customer.
- Contact: you then specify the name of your customer.
- The other fields are optional.
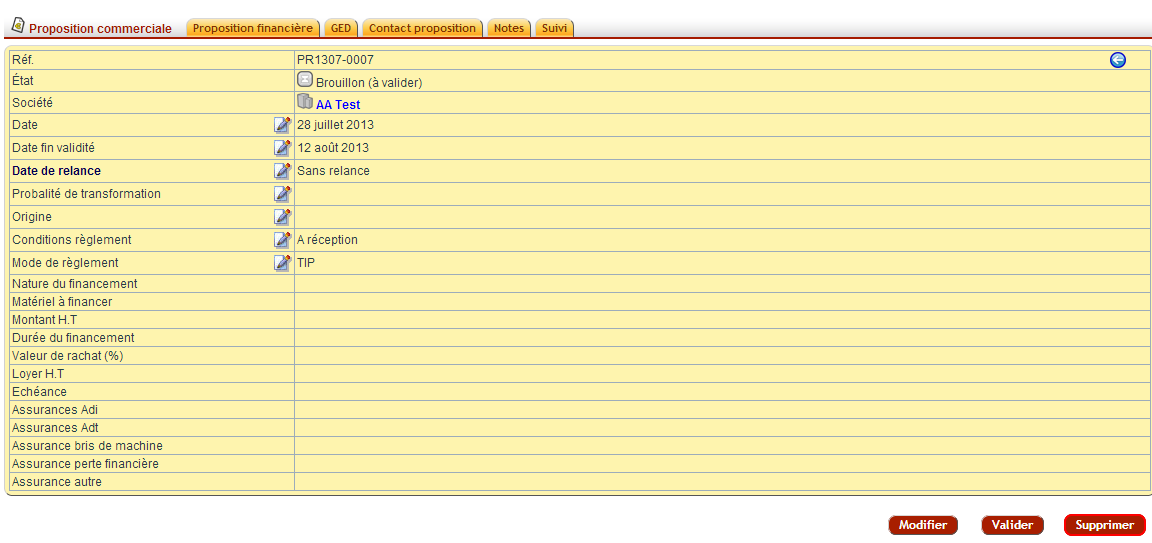
Next, validate with the “Create draft” action. This way, a new screen appears. Additionally, it consists of four tabs.
First, the “Financial Proposal” tab is used to enter the offer.
- Click “Edit”, then fill in the form.
- Next, validate the proposal after each modification. This way, you avoid errors related to interrupted data entry.
- Finally, “Delete” permanently removes the proposal and its attached documents.
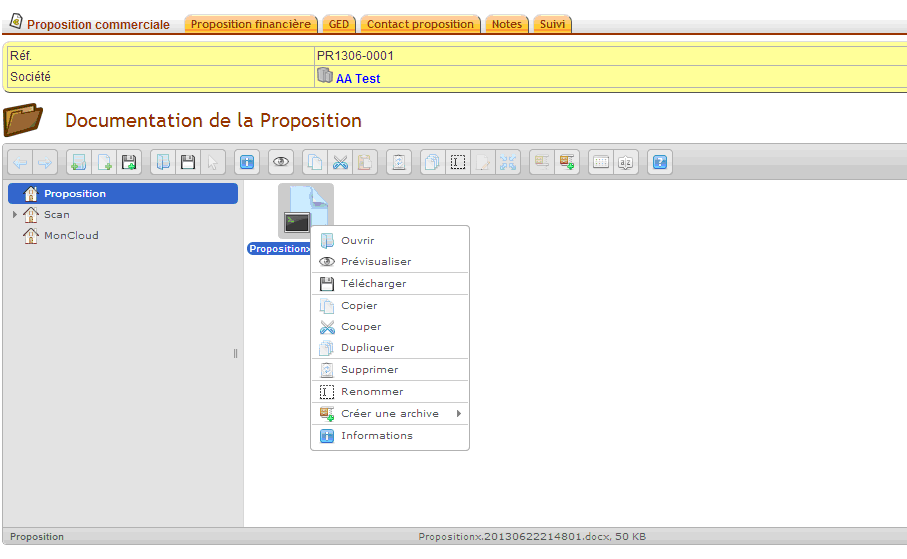
Next, the “Document Library” tab refers to electronic document management. This way, you access documents generated from the form and stored on the server.
Moreover, the left section groups three types of folders:
- Proposal: documents related to the proposal.
- Scan: this folder retrieves documents from the company’s scanner. It is currently unused.
- MyCloud: the private section for each user account.
Additionally, you move documents by drag-and-drop. To display commands, right-click the mouse.
- First, “Download” opens the document on your computer for editing. Then, drag the modified document back to the server window. This way, you store it again.
- Moreover, the copy or delete actions are similar to standard PC actions.
- Finally, “Create an archive” compresses large documents. For example, you then send them by email.
The “Quote Contacts” tab refers to the contacts associated with the offer.
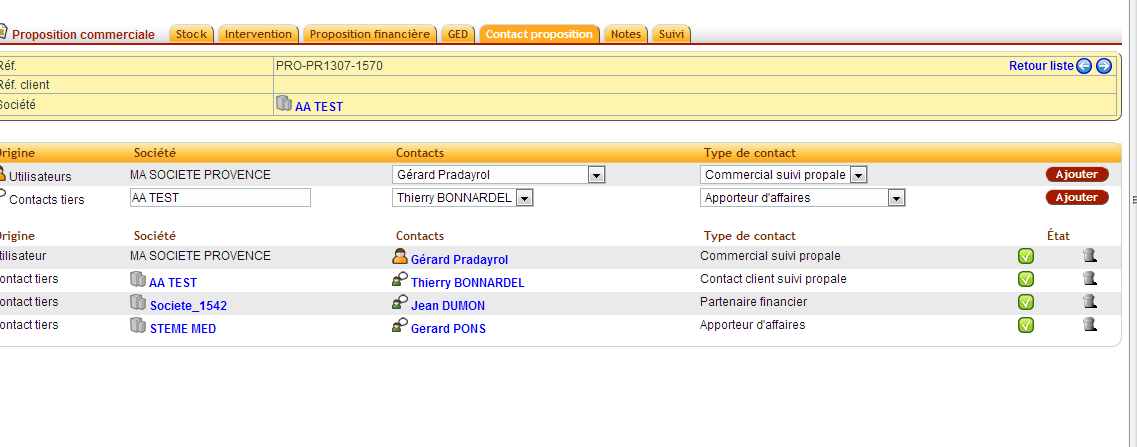
Here you assign all contacts linked to the quote. This information is then used to generate documents.
First, the “Origin/Users” column (line 1) is for sales staff. This designates the person handling the quote.
Next, the “Origin/Third-party Contact” column (line 2) is for external contacts. The company field lets you select them from your Customers or Suppliers.
For example, you can designate:
- The business introducer: the intermediary.
- The financial partner: who funds the project.
- The quote follow-up contact: the end customer.
Ensure each contact is properly assigned, as they’re essential for document generation.
The “Notes” tab is currently unused.
Finally, the “Tracking” tab shows technical details about the quote.
Quote Statuses
Statuses indicate the quote’s progress. Depending on the status, buttons like “Send email” become active.
- Draft
- Validated
- Signed (ready to invoice)
- Not signed (closed)
Editing Payment Schedules
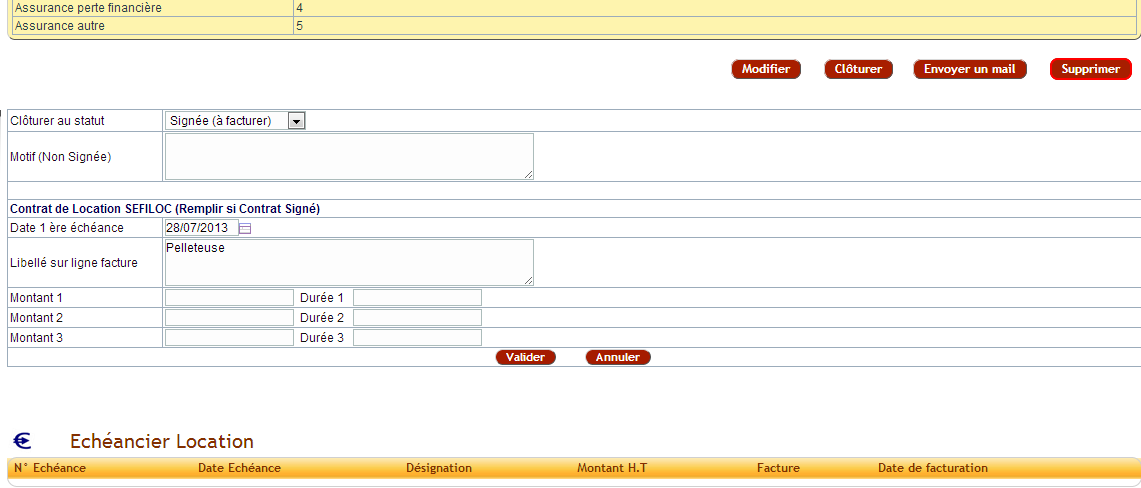
When closing a signed quote, the system detects if it’s a lease agreement and triggers the appropriate process.
A form lets you enter relevant details to automatically generate your invoices.
Document Generation
You can generate documents once the status is “Validated”. In “Attached Files”, select the document to generate.
Warning: newly generated documents overwrite previous versions of the same type. We recommend moving them via the document library to either a dedicated folder or manual indexing.
For example, in the “Rent excl. VAT” field, the “-” separator creates line breaks in generated documents:
| Rent excl. VAT | 1st rent 2000 € – 36 rents 500 € – 10 rents 400 € |
Templates
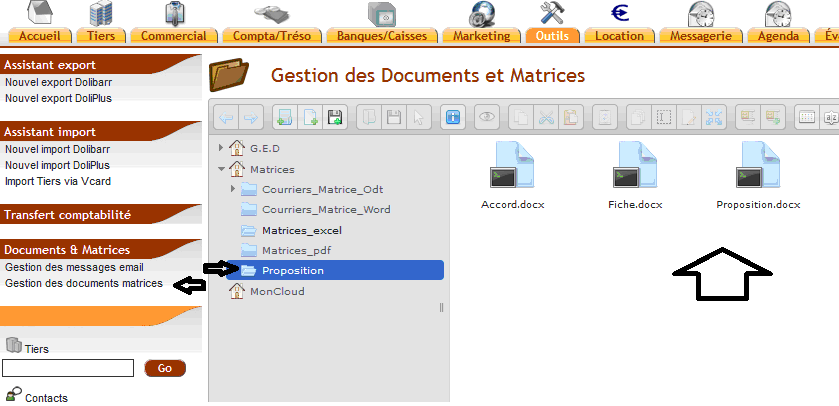
Always save templates in Word 2007 format or later – this is mandatory.
To see your template in the quote list, place it in the correct subfolder via Tools > Documents & Templates > Template Management.
You can freely modify templates, but always respect variable names (e.g. ${myvariable}).
 Warning: variables must use ${} syntax. Type them in Word in one go – no backspacing, deleting, or copy-pasting, as Word adds invisible formatting that prevents variable replacement.
Always keep backup copies of original templates before modifying them.
Generating Monthly Lease Invoices
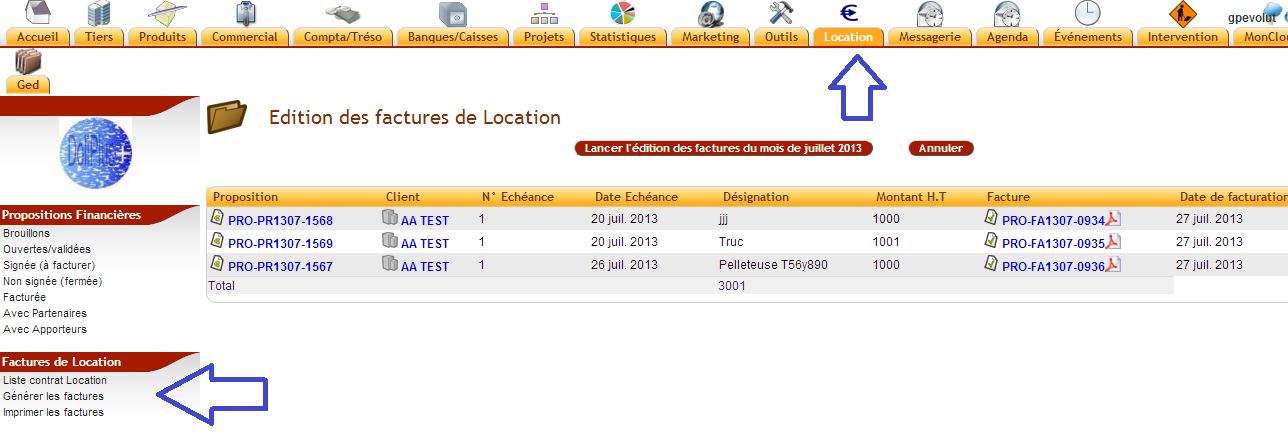
First, open the Location menu, then select “Generate invoices”. This allows you to edit invoices from the current month’s payment schedules.
Next, the default payment method is direct debit. Additionally, a direct debit request is automatically sent.
Finally, a table displays the generated invoices. This lets you review them before proceeding.
SEPA Direct Debit Processing
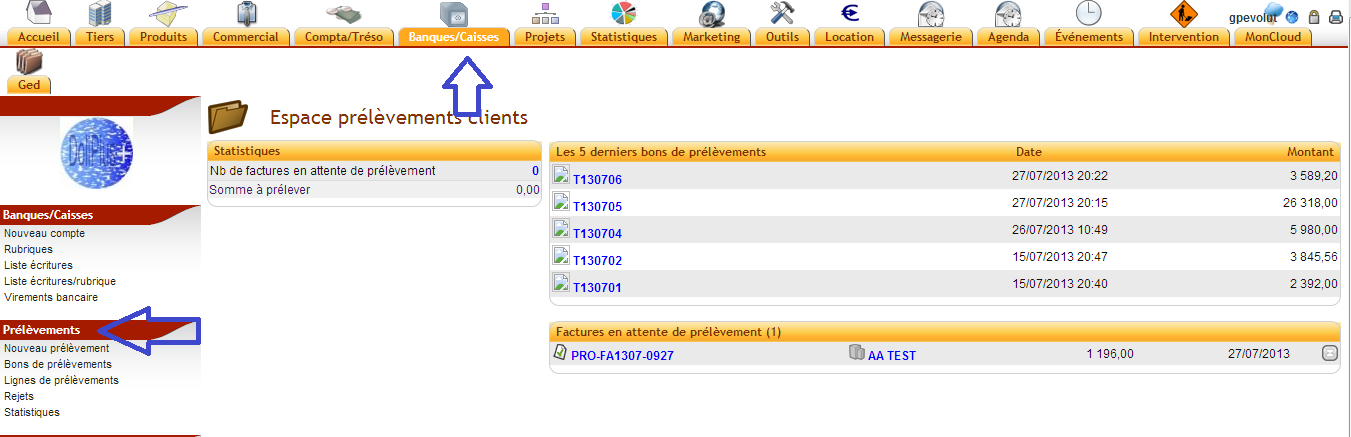
First, open the Bank/Cash menu, then select “Direct Debits”.
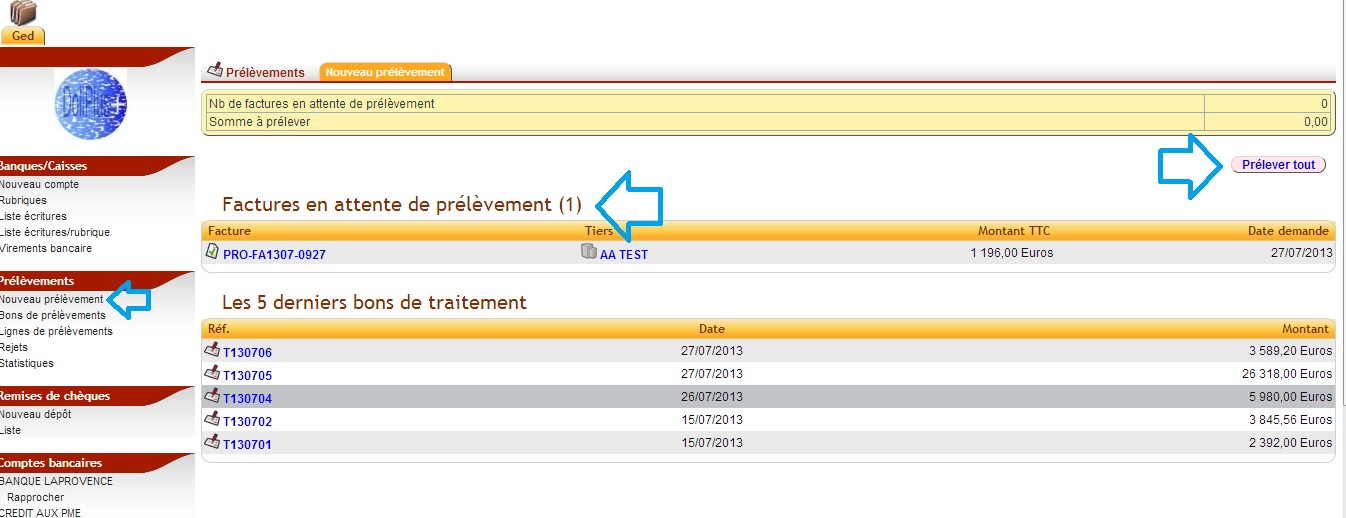
Next, create a “New direct debit”, then click the “Debit all” button.
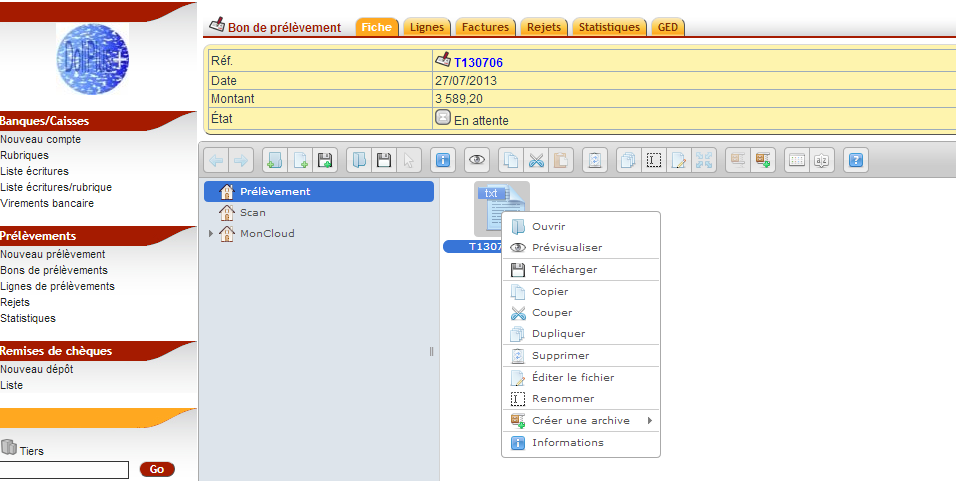
Finally, retrieve the SEPA-compliant text file from the direct debit document library.
Furthermore, the DoliPlus file follows SEPA standards (ISO 20022 XML). Therefore, you need to obtain your SEPA creditor identifier (CID) from your bank. Additionally, each customer record must contain the IBAN and BIC/SWIFT identifiers.
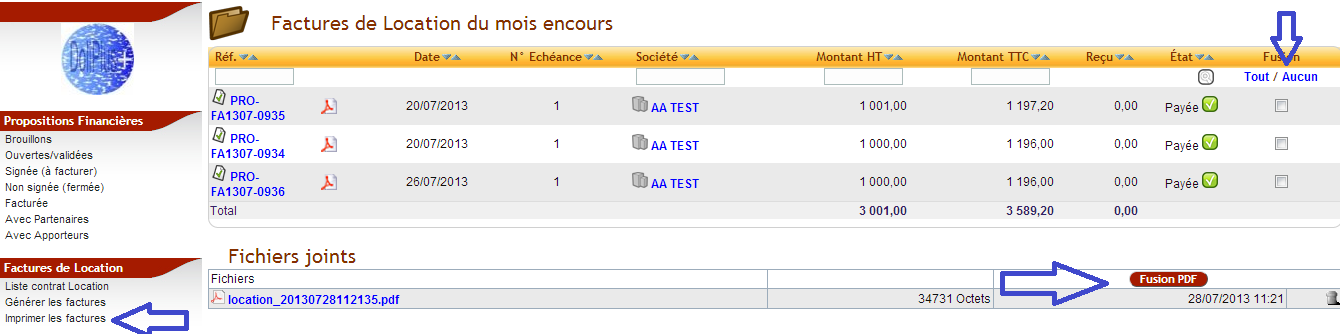
Merging rental invoices
First, merging monthly invoices creates a paper version. This can then be sent by post.
Finally, delete the merged file after use. This helps maintain a clean workspace.