 on 5 September 2026
 Prestashop 1.7 Connector for DoliPlus
The Prestashop 1.7 connector for DoliPlus links your online store to your management software. This way, your products, orders and customers sync automatically, in both directions.
This eliminates double data entry. Plus, you can manage your entire business from a single tool, even if you also sell in-store or over the phone.
This chapter only covers the new connector for Prestashop versions 1.7.x to 1.7.6.
Prestashop 1.7 connector: what it does
The Prestashop 1.7 connector keeps DoliPlus and your online store in constant communication. For example, an online order flows into DoliPlus, then the updated stock levels in DoliPlus sync back to Prestashop.
For an overview of the connector, first refer to the chapter DoliPlus PrestaShop Connector for e-commerce sites.
Installing the module on Prestashop
Reminder: this module has special pricing. Please contact our sales team.
Also, this configuration is the responsibility of the customer or their webmaster. We do not provide support for your Prestashop installation.
Installation on DoliPlus
Note: if you were using connector version 1.6, uninstall it first, then install the new module.
In the top table, generate the token and security key, then click “Save”.
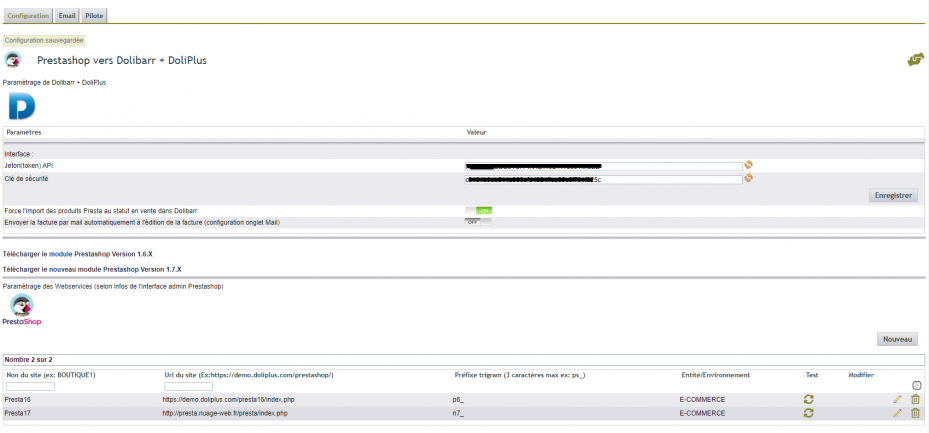
In the bottom table, click “New”. Use the provided template, then replace the values with your own. You’ll complete the Prestashop service key later, as explained in the “Enable and configure Prestashop web service” section below.
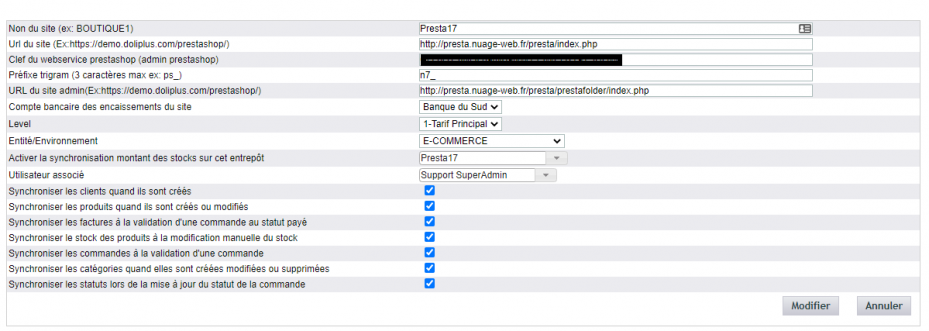
Then adjust a few settings to secure data exchange:
- Set shop user permissions for orders, invoices and shipments.
- Configure the stock module to increase upon supplier order receipt and decrease upon shipments, for shipment module management.
- Enable PG57 option (changing customer name at printing via invoice contact) to adjust addresses on invoices, orders and shipments.
- Disable option 148 (hide Tel and Fax for shipment and delivery recipient).
- Enable option 163 (show customer email) for orders and invoices.
Important security note
You generate the token and security key from DoliPlus (orange double arrow). However, you generate the web service key directly in Prestashop.
Finally, these three values (token, security key, Prestashop web service key) must remain separate.
Sending DoliPlus invoice by email
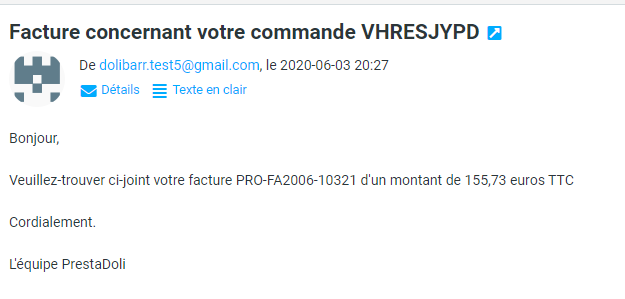
You can enable invoice email sending. First configure the email account used for these sends.
The email template accompanying the invoice is configured following this chapter’s instructions.
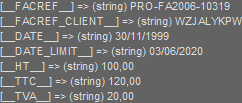
The documentation’s substitution variables remain valid. Additionally, the Prestashop order reference appears in the invoice’s customer reference.
Installation on Prestashop (PS)
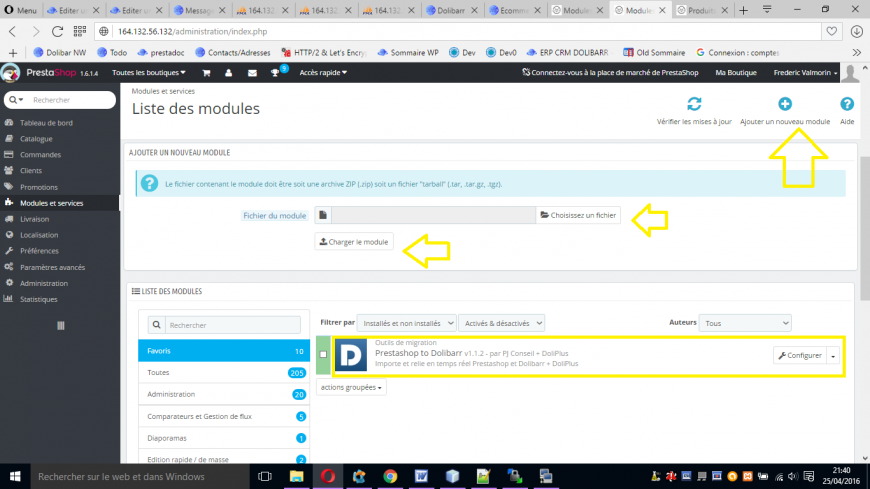
- Download the module provided in the PRESTADOLI module settings of DoliPlus, then install it on your Prestashop server.
- Retrieve the security key and token from the DoliPlus settings, then enter these values in the Prestashop configuration.
- Finally, create a user with read and write permissions for customers/suppliers, orders, invoices, products, and categories.
- Test API access.
Importing data from Prestashop
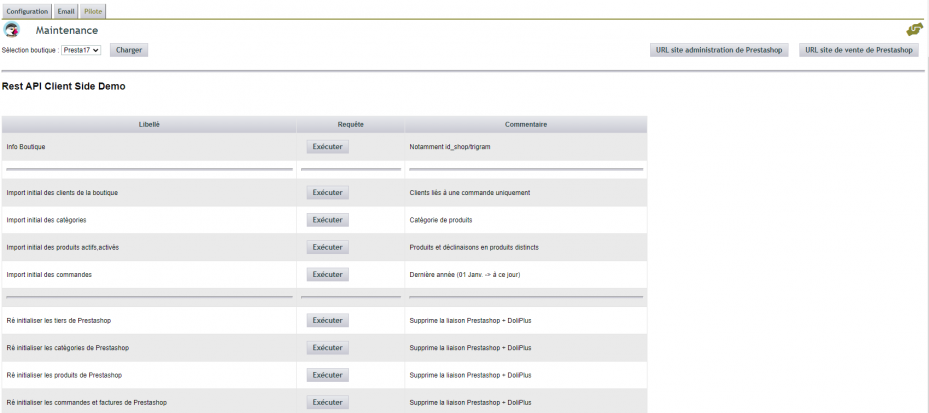
Your Prestashop already contains data. Use the “Pilot” tab in the interface to transfer this data into DoliPlus.
In a multi-store setup, first select the relevant store.

Note: Run this import only during initial setup to retrieve existing data. Do not run it again in production.
Enable and configure the Prestashop web service

You’ll receive an API key and the site URL. Enter both in the DoliPlus module settings.
Before testing, verify these three points on the Prestashop side:
- Your API key is correct and its permissions are properly set.
- URL Rewrite is enabled.
- For Nginx or OVH shared hosting, URL rewrite rules are in place. For Apache, you may need to add a .htaccess file in your Prestashop’s /webservice folder.
Then test the API, for example at https://demo.doliplus.com/prestashop/api/?dplang=en. Enter the API key as login and leave the password blank.
A page like this should appear, with the permissions validated message:
<products xlink:href="http://demo.doliplus.com/prestashop/api/products?dplang=en"
  get="true" put="true" post="true" delete="true" head="true">
  <description xlink:href="http://demo.doliplus.com/prestashop/api/products?dplang=en">The products</description>
  <schema xlink:href="http://demo.doliplus.com/prestashop/api/products?schema=blank&dplang=en" type="blank"/>
  <schema xlink:href="http://demo.doliplus.com/prestashop/api/products?schema=synopsis&dplang=en" type="synopsis"/>
</products>
Setting the default language
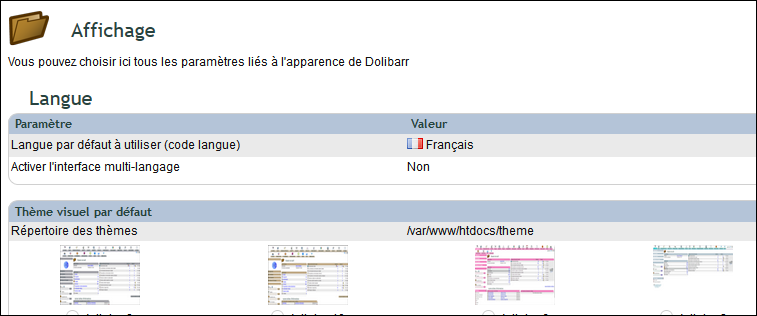
Go to Configuration / Display. Confirm French as the default language to ensure your documents generate in French.
Products and variations
Prestashop does not check for a reference. You must first enter a reference for the base product before creating variations (e.g. “myproduct”).
However, the reference for the variation remains optional. DoliPlus automatically generates references from the main product’s prefix:
- myproduct_d1
- myproduct-d2
If you change the references of the varied products in Prestashop, DoliPlus will create new references. Mark old references as “out of stock” if sales history exists, or delete them if no longer needed.
Additionally, restricted characters (space, ‘, /, , :, *, ?, “, <, >, |, [, ], ,, 😉 are replaced with “_”. Then, the references of the varied products are updated in Prestashop.
Note:
- When creating a variation, a double entry is still required to ensure synchronisation.
- With Prestashop’s variation generator, simply confirm by saving one of them.
Product returns. If enabled in Prestashop, product returns are managed from Prestashop. If no refund is issued, create a discount voucher for the customer’s next purchase instead.
Product photo management
Photos are automatically uploaded to DoliPlus. However, monitor their size, as it affects display and transfer quality.
Payment methods
DoliPlus automatically creates payment methods.
Additionally, if you use the free Paybox module in Prestashop, you can reuse the same subscription for other needs in DoliPlus. See “Online Paybox card payments with DoliPlus” for details.
Customer invoices and credit notes
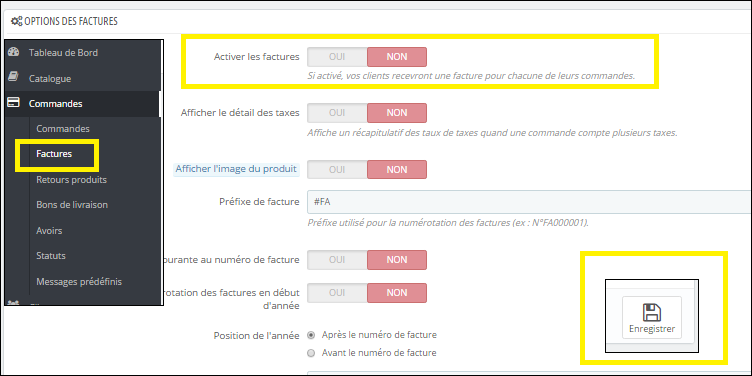
DoliPlus does not manage invoices and credit notes in Prestashop. This ensures a single numbering sequence for all your sales channels.
To prevent invoice generation in Prestashop, follow the instructions in the image below, then also disable email sending.
DoliPlus then automatically creates invoices with their associated payments. You send them to the final customer from DoliPlus.
Finally, the interface lists the latest invoices on demand, or all invoices from a specific store.
Purchases and supplier order receipts
Do not enable these options in Prestashop. The principle is to manage purchases and suppliers in DoliPlus.
If the shop sells made-to-order products, preferably create a secondary warehouse. Then declare it in the module configuration to automatically allocate customer demand to this warehouse rather than the shop’s warehouse. The positive balance then goes to the shop’s warehouse.
Selling Prices
You manage selling prices exclusively in the shop.
Additionally, in case of multiple selling prices, a configuration option designates the price class to synchronise. The connector also supports eco-contribution.
Discount Management
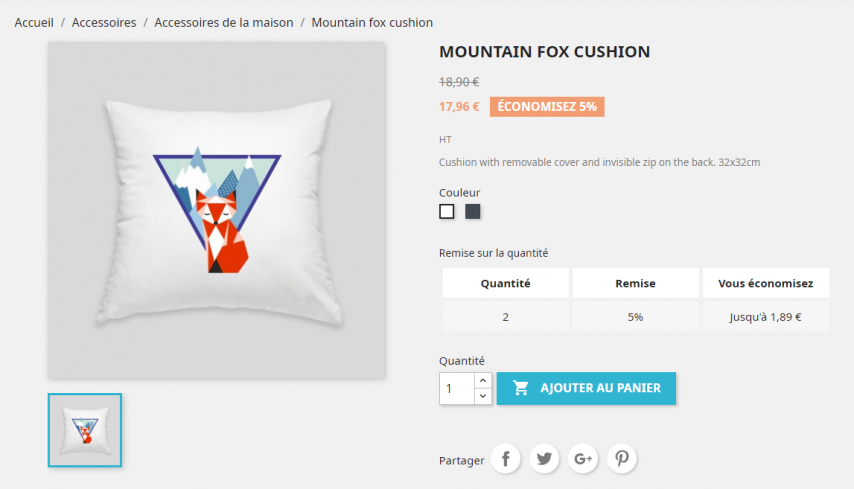
Discounts come either from reductions entered in the product line or from a separate line.
Stock Management
Warehouse Selection
First, define the warehouse reference (e.g. « stock A ») in the DoliPlus shop configuration. The connector then ensures bidirectional synchronisation.
Additionally, the left menu offers a dedicated list for products synchronised with Prestashop, according to the warehouse defined in the configuration (see inventory below).
Inventory
After an inventory carried out in DoliPlus, you can force a global stock update to Prestashop for products with a « for sale » status.
For further details, refer to the Stock Management chapter. In a multi-shop configuration, first select the relevant shop.
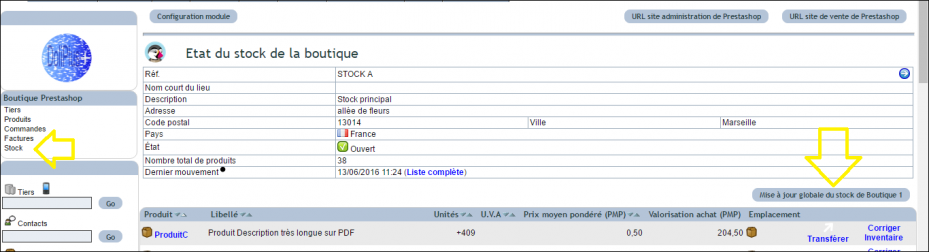
A « Presta » tab then compares the shop’s stock and DoliPlus stock. A CSV export is also available.
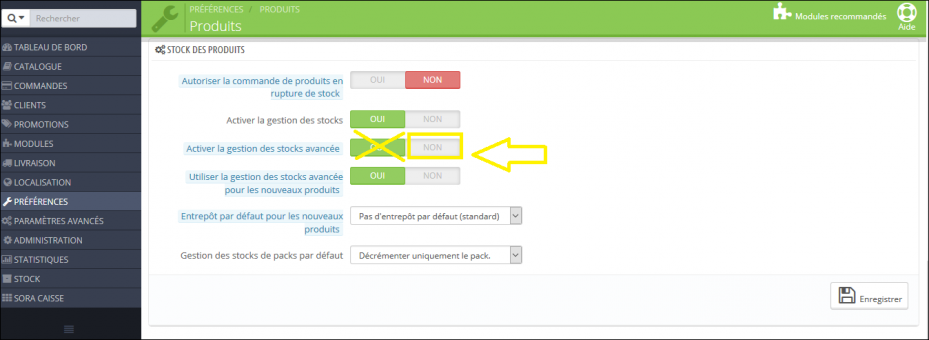
Note: disable advanced stock management in Prestashop.
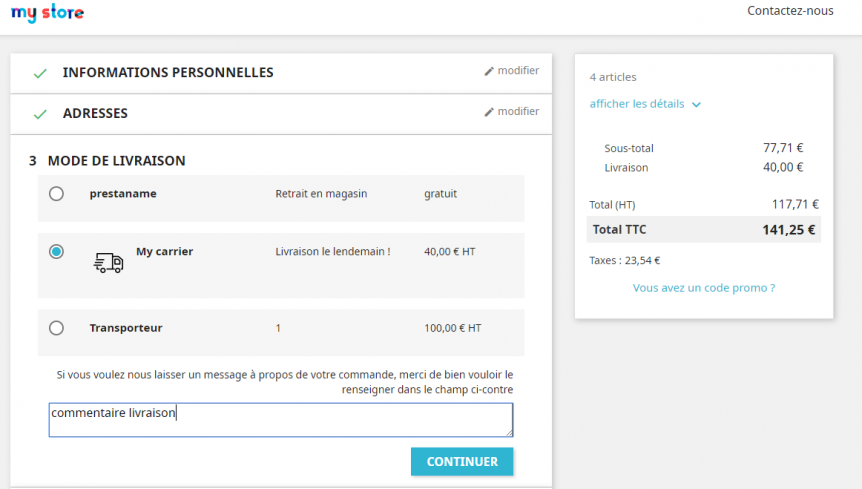
Delivery Comments
The comment left by the customer then appears in the public note of the order.
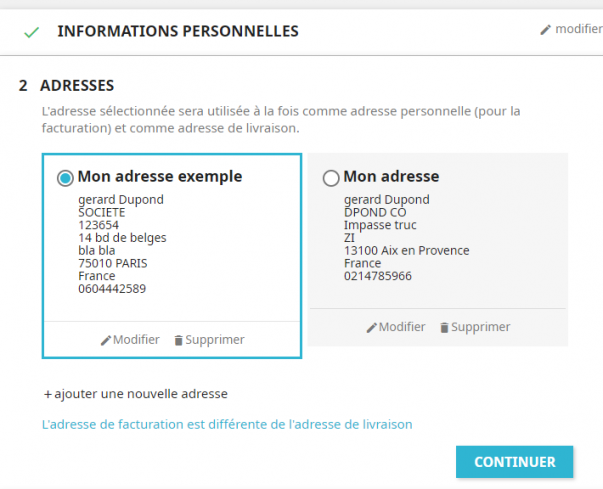
Delivery and Billing Addresses
The « contacts » tabs of the order and invoice include these details. Each address then has a role adapted to its context.
Stock Requirements and Delivery Notes
Replenishment
To process bulk replenishment for out-of-stock orders, use the Replenishment module.
Delivery Notes
If stock is deducted upon validation of delivery notes, the connector automatically generates DNs for available products. This updates the shop’s stock in real-time.
To print these DNs in one go, navigate to the shop’s shipments list and use the print button.
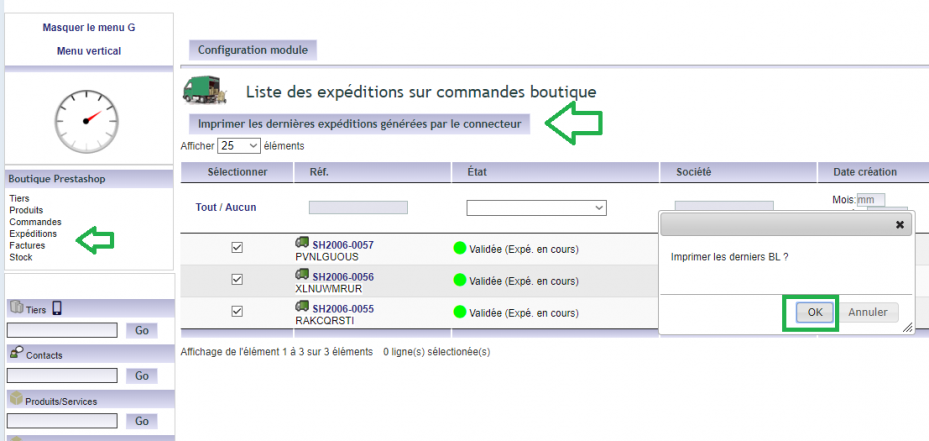
For out-of-stock items, first follow the replenishment steps above. Then use the “Shippable Orders” module to bulk-generate DNs as supplier deliveries arrive. Depending on configuration, you may also receive a consolidated PDF of generated DNs.
Finally, to display the delivery service in the PDF, enable the PG36 option (services can be added or removed from stock).
Multi-Shop
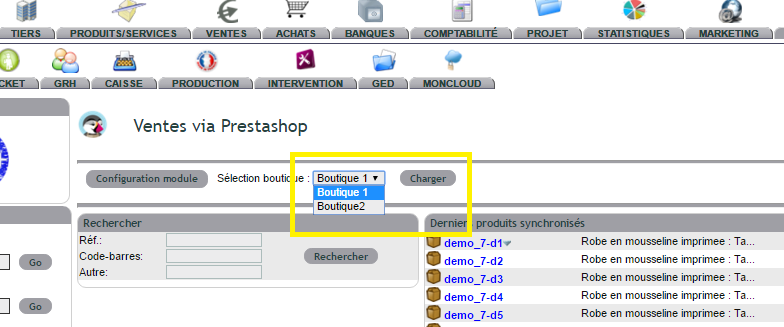
First declare your shops in DoliPlus’s DOLIPRESTA configuration. The trigram then lets you differentiate between sites.
A dropdown menu will then appear in the management interface to switch between shops.
Multi-Company
The module remains compatible with multi-company setups. Simply specify this in the shop configuration.
DoliPlus to Prestashop Communication
Stock: Receipts and Adjustment Movements
As mentioned earlier, this upstream communication is supported.
Batch Management:
- A dedicated option handles unit batches and converts stock quantity into batch numbers (see support).
- This disables automatic DN generation and downstream stock management, letting you select batches when creating DNs.
Product Record Creation
First enable product sync in configuration if available.
- Only Prestashop “simple” products are created. Their first photo (alphabetical order) is also uploaded to the document library.
Product Record Update
Again, enable the product synchronisation option in settings if available.
- Only “simple” Prestashop products are updated.
- This is a partial record update (reference, description, EAN13, selling price…).
- The custom field “Accept orders on Prestashop” is supported.
- UOM (KG, M, L) are managed and unit price syncs bidirectionally with Prestashop. Set unit price precision to 6 decimals in DoliPlus.
Creating an individual customer record
First enable the customer sync option in settings if available.
- Select creation of an individual-type customer.
- A button on the customer record then syncs it with their billing address.
- Link the corresponding contact to the billing address and shop. Prestashop uses this contact’s first and last name.
- The “Customer” group applies by default.
Updating an individual customer record
A button on the customer record syncs it. Remember to link the corresponding contact to the billing address.
Creating an address
First enable the customer sync option in settings if available.
- The customer must already be synced with Prestashop.
- A button on the contact/address record then initiates synchronisation.
Updating an address
Similarly, the contact and customer must already be synced with Prestashop. A button on the contact/address record then initiates synchronisation.
Retrieving addresses created in Prestashop

From an already synced customer record, select “Search for new addresses in Prestashop”.
Assigning a customer to a new Prestashop group
- Go to a synced customer record, under the “Category” tab.
- Assign a group, and optionally set a new default group.
Assigning customers to a group based on DoliPlus category
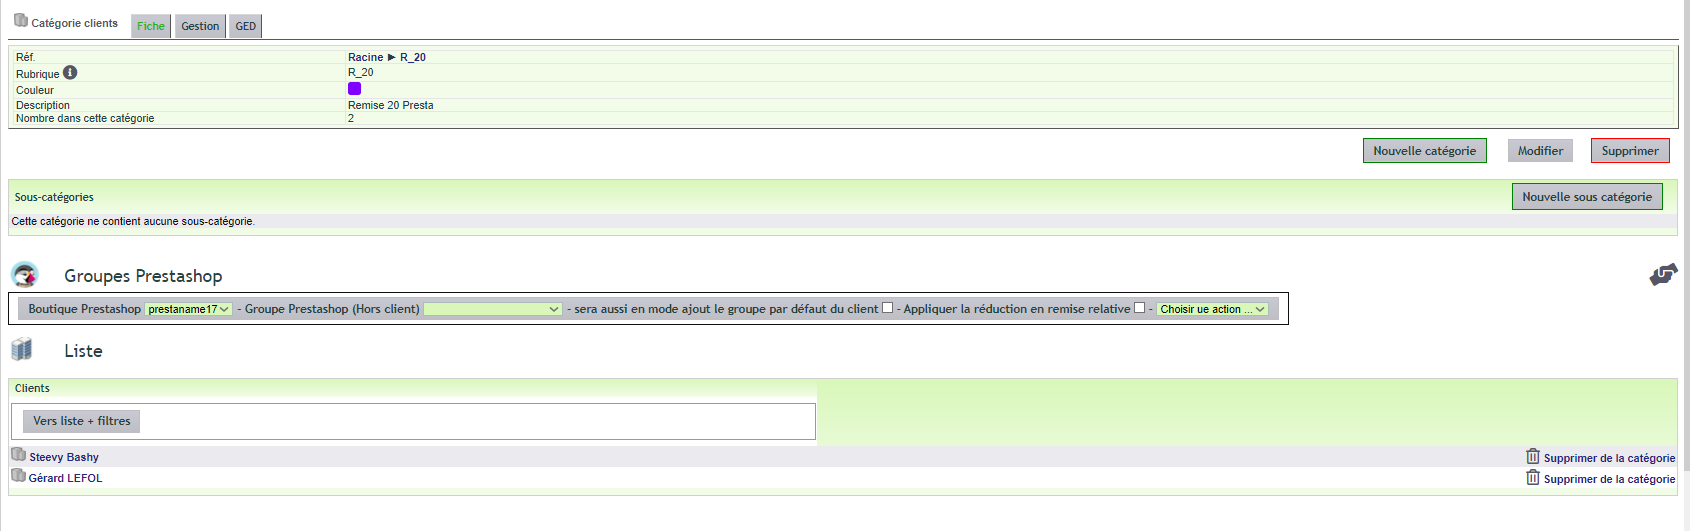
- Go to a customer category tab synced with Prestashop.
- Assign a group, optionally add a new default group, or remove a group from customers.
Note: You cannot delete the « Customer » group. If you remove all other groups, this one automatically becomes the default group.
Customer-specific discount. To apply it, first enable the option « Synchronise customer-specific discounts from DoliPlus to Presta via the customer group / discount ».
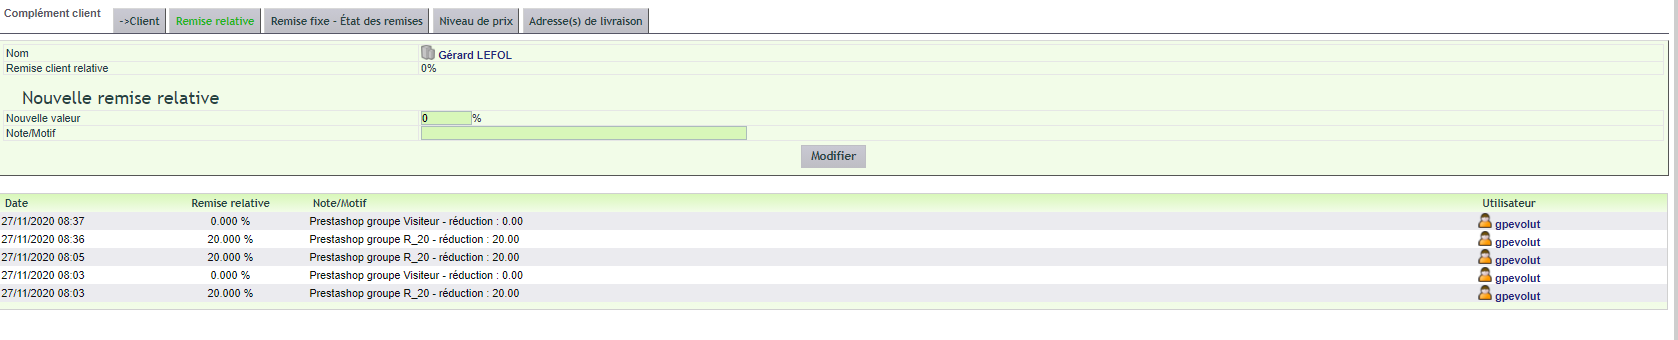
- You can add the discount amount as a customer-specific discount in DoliPlus.
- To remove these discounts, then synchronise a group with no discount, ticking « Apply the customer-specific discount ».
Supplier order
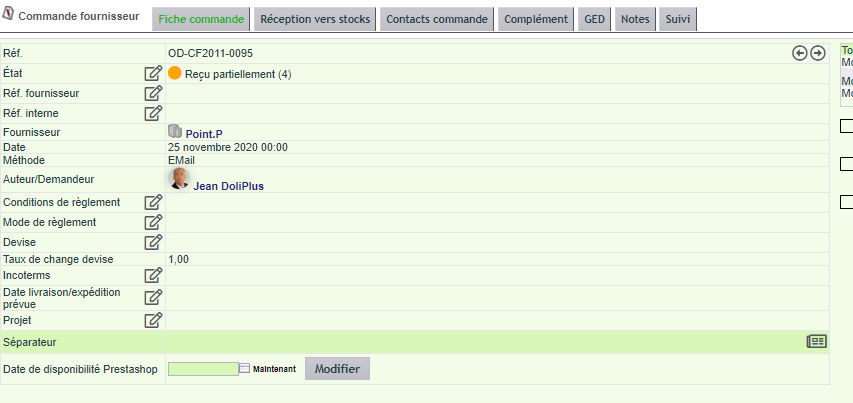
- An option synchronises the DoliPlus availability date (module-specific field) with the « availability date » in PrestaShop.
- This synchronisation also allows you to accept orders in PrestaShop.
- With an empty date, it clears the date in PrestaShop and restores the default shop behaviour.
Customer order
You can synchronise a customer order placed outside the shop to enhance the customer area in PrestaShop. To do this, several conditions must be met:
- the order is not already synchronised;
- the customer is already synchronised in the shop;
- a delivery address, via a delivery contact, is assigned to the order;
- the order is fully delivered and the delivery note matches the order;
- the order is invoiced;
- a shipping service exists, with the carrier name in the description after the tag « delivery: » (example: delivery: MY_SHIPPING).
PrestaShop 1.7 connector update
The module is provided for compatibility with PrestaShop. Before any PrestaShop version update, check the documentation to ensure your version remains compatible.
To update the module: download it as for the first installation, but do not uninstall it.
Example: shop with backorder sales
In this example, the shop sells repair parts. It has some parts in stock and others only available on order.
The customer then places a mixed basket order: two parts on order and one available part.
The connector immediately creates in DoliPlus:
- the customer or supplier, if it doesn’t already exist;
- the order;
- the invoice, then the payment with shipping;
- the delivery note for the available part, which it validates to reserve the part and update the shop’s stock. The order then moves to « Awaiting dispatch ».
Next, the stock manager identifies the order using the management interfaces, then orders the parts from the supplier.
On receipt, the software analyses the needs of customer orders. It therefore splits the received quantity between two stocks:
- the « pending stock », for the expected parts;
- the main stock, which receives the balance.
From this point, a « orders to dispatch » table shows the order as « ready to ship ».
Finally, a bulk action generates the final delivery notes. The initial delivery note, supplemented with the received parts and isolated in the « pending stock », decrements the latter. An interface then displays the complete delivery notes to be delivered and allows bulk editing. The warehouse receives the delivery note, then ships the order.
Live demo
To test the PrestaShop 1.7 connector, visit our public demo. A dummy credit card lets you simulate your purchases.
PrestaShop DoliPlus connector for e-commerce sites — also discover the connector’s overview.
https://erp-crm.fr/encyclopedia/prestashop-version-de-demo-ligne/
Further reading
- The extranet portal: your business customers reorder on their own — the B2B counterpart of the shop, with each customer’s negotiated prices.
