 on 7 July 2026
Why choose timesheet software built into your ERP?
Your DoliPlus solution includes timesheet software that records the time spent on your projects in one simple grid:
- a quick entry sheet, per project and per person, in a weekly or monthly view;
- no need to create tasks when the goal stays simple;
- a cost summary on each project, valued with the hourly rate of each employee;
- absences (holiday, sick leave…) declared in the same grid, linked to human resources;
- bulk import of your timesheets from a spreadsheet file.
As a result, you get reliable figures for your project analysis and management reviews, without any extra data entry. DoliPlus is the enhanced cloud edition of Dolibarr, the open-source ERP & CRM used across Europe.
There are several ways to declare time on a project. However, the timesheet grid offers the simplest and easiest view. Here is an overview of the tool below.
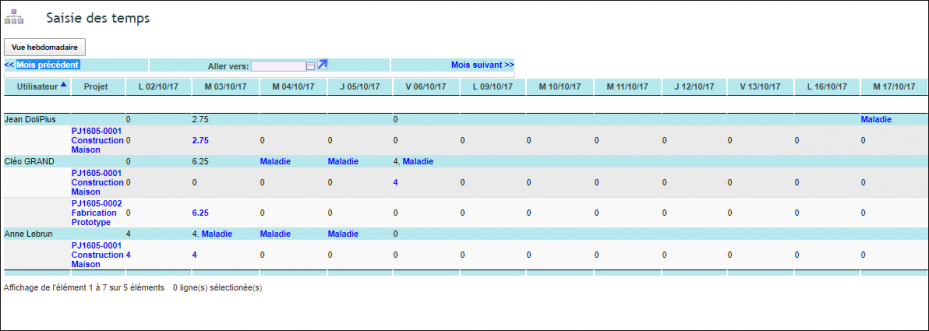
The time entry sheet of the timesheet software
This method simplifies the overall recording of the time spent on a project.
Indeed, the timesheet software avoids creating tasks when the objective stays simple. In other words, the best tools are sometimes the simplest ones.
In practice, your team measures the time spent. You therefore get solid figures for analysis and management follow-up.
Entering time
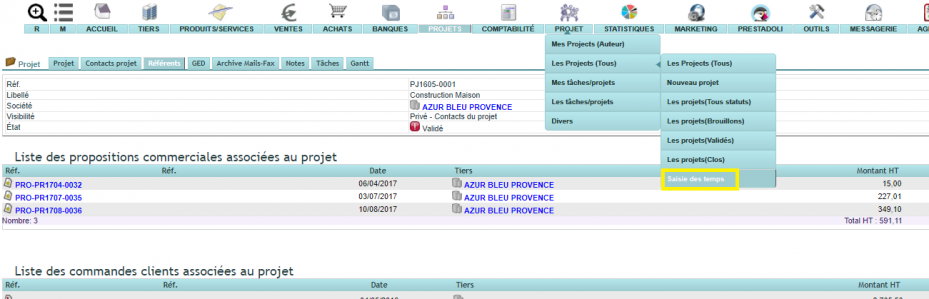
First, open the time entry from the project itself. The screen below shows this access.
Next, you choose a weekly or a monthly view. The following picture illustrates this double view.
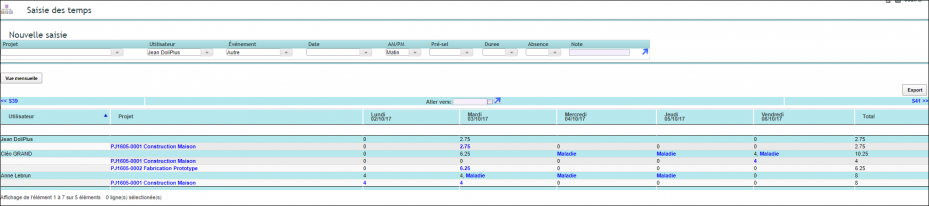
Furthermore, a simplified entry area sits at the top of the sheet. Thanks to it, you chain one entry after another, as shown below.

- First, the entry records time per project and per person.
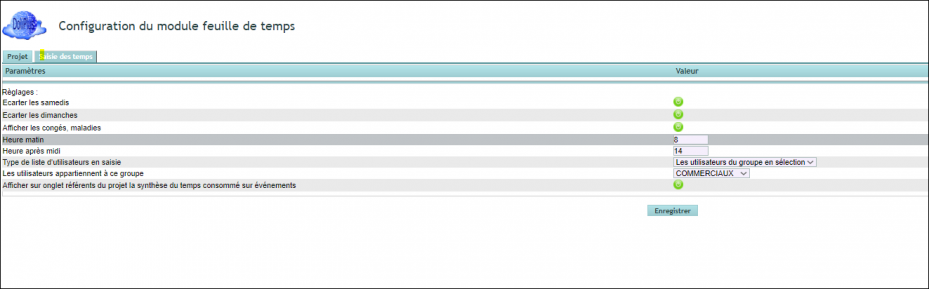
- Moreover, the option “Type of user list for entry” changes how the user list is filtered;
- In addition, you pick items in the lists simply by typing on the keyboard;
- Finally, the dates are pre-calculated for the current week.
- Next, you can declare an absence to human resources, with a reason (holiday, work accident…).
- For this, the option “Show holidays and sick leaves” must be enabled;
- Moreover, the person entering the absence needs a specific right: she must belong to the group defined in human resources to approve leave requests.
Additional custom fields
Perhaps you want to record extra information, as in the example below.
To do so, simply create custom fields on an action, with the specific group “SAISIE_TEMPS”. See the chapter: Forms with custom fields
Cost summary on the project
Furthermore, the overview tab of the project displays a cost summary.
Naturally, this summary follows your configuration options, as shown below.

Links with human resources
Declaring time sometimes also means declaring absences. That is why the tool works hand in hand with the DoliPlus human resources module.
- First, the absence entries feed the human resources records;
- Then, the average hourly rate from the employee card values the time spent.
Bulk import from a spreadsheet file
In addition, you can import your timesheets in bulk from a spreadsheet file (CSV).
In this way, the absence lines feed the human resources tables. Moreover, the presence lines can carry daily allowances, depending on your configuration.
The screen below shows this import.
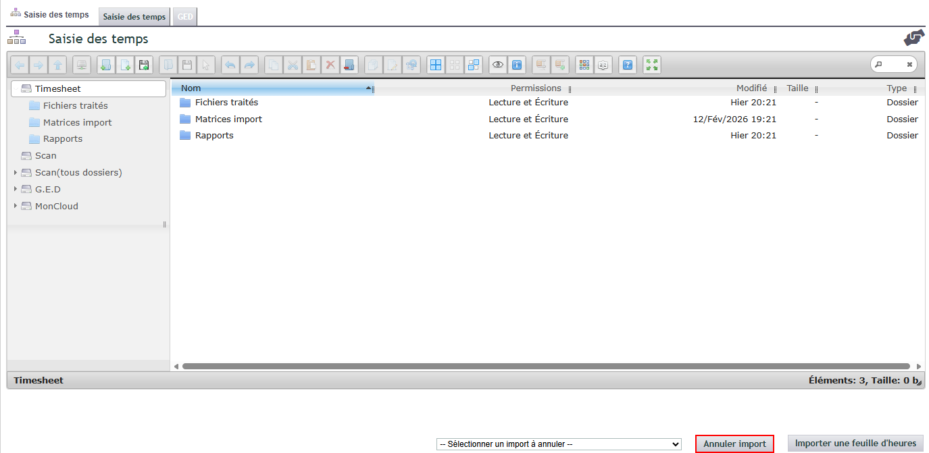
In practice, a documents tab attached to the entry sheet lets you upload the file. Furthermore, DoliPlus automatically detects the comma or semicolon format.
Processing folders
Processed files
This folder receives your file after processing, with a timestamp.
Import template
Next, this folder contains an Excel file. Thanks to it, you set up your entry in Excel or Airtable, with in particular:
- THE TABLE HEADERS IN CAPITAL LETTERS — other columns are ignored;
- THE AVAILABLE ABSENCE TYPES;
- THE AVAILABLE EXPENSE CODES;
- THE ACTIVE USERS.
Report
Finally, a text file provides a summary of the import.
Processing safeguards
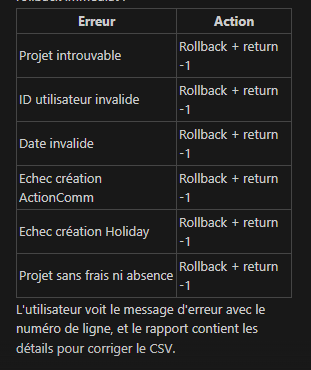
Furthermore, several safety checks protect your import. Thus, a badly formed file remains harmless, as shown below.
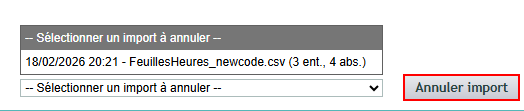
In addition, a rollback reverses an import that went through. For this, you use a selection list, as shown below.
Enabling the options in the project module
Finally, go to the configuration of the Project module. There, you enable the options, as on the screen below.
Related Entrées
