 on 7 July 2026
Why choose team scheduling software built into your ERP?
Your DoliPlus solution includes powerful team scheduling software, fully integrated with your ERP and CRM:
- a graphical calendar with drag-and-drop rescheduling, on computer, tablet and smartphone;
- shared calendars for your staff, projects, resources and equipment;
- synchronisation with iOS and Android phones, based on the CalDAV open standard;
- event invitations for colleagues and external contacts, sent by email with confirmation tracking.
As a result, everyone sees the right schedule at the right time — and you plan your whole business from a single place. DoliPlus is the enhanced cloud edition of Dolibarr, the open-source ERP & CRM used by thousands of companies across Europe.
Moreover, we recommend reading these related chapters:
Overview of the graphical calendar
First of all, the graphical calendar displays your events by day, by week and by month.
- The Previous/Next buttons let you move through the calendar dates.
- The “Today” button takes you back to the current date. Please note: the calendar remembers the last period you viewed.
- The calendar icon also lets you jump to any date.
- The hour scale sits on the left-hand side of the planning view.
Depending on your permissions, you can create, edit, delete and drag-and-drop events in the calendar.
Filtering the events you see
This point really matters. Indeed, each view comes with its own filter. Both users and administrators can customise it to limit the types of event displayed.
Therefore, the filter keeps the schedule easy to read. Everyone only sees the events that are useful to their role.
For example:
- A sales person can filter on appointments, phone calls, and quotes or opportunities to follow up.
- A field technician can filter on the service jobs to carry out.
Creating a new event
To create a new event, first click the calendar icon to check the available time slots. A “New event” window then appears.
Alternatively, you can click directly on the calendar at the desired time, or create a matching action inside DoliPlus.
Next, enter the event name and location, then set the start and end time.
To save the event in the calendar, click the “Save” button. However, if you want to leave the window without saving, simply click Cancel.
Editing an event
To edit the details of an event, click on the event box.
Then, to change the date and time, drag the event box in the Week or Month view.
In the Day view, you can also adjust the duration by dragging the edge of the event box.
Events spanning several days
You can define a multi-day event when you set its start and end dates.
The “All day” checkbox controls the start and end hours. After that, simply pick the period with the date selectors.
In addition, the Info button opens the linked DoliPlus action. You then reach the related document — for example a quote, an order or a service job.
You can also open the full event card in DoliPlus straight from the graphical calendar.
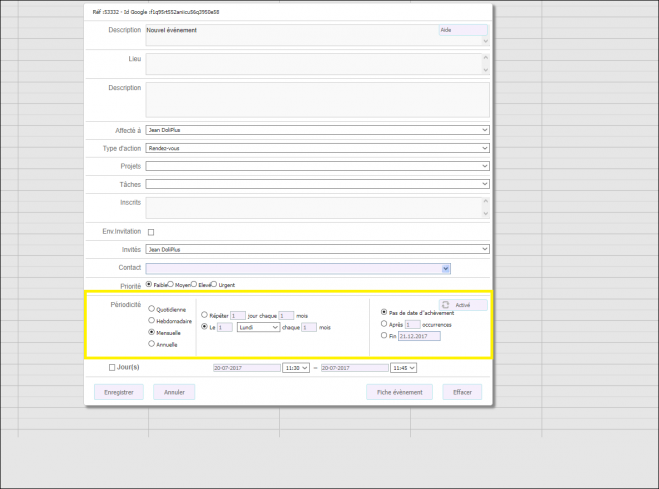
Recurring events
Furthermore, the calendar handles recurring events.
Please note:
- Very long recurrence periods are limited to one year.
- Recurring events are managed on the graphical calendar only.
Internal and external invitations
The calendar also lets you invite internal users or external contacts to an event through their email address.
Each guest receives an email with a confirmation link, so you can track who has accepted.
Deleting an event
Open the “Details” window, then click the Delete button.
Direct use on tablets and smartphones
A New button lets you create an event on touch devices, because the team scheduling software adapts to tablets and smartphones.
Drag-and-drop also works in touch mode. Moreover, a left or right swipe moves you to another period.
Setting up your team scheduling software
First, go to the administration console (Caldav module).
Shortcut:
Home -> Setup -> Calendar
Then, the wrench icon edits the configuration of each user.

Filter
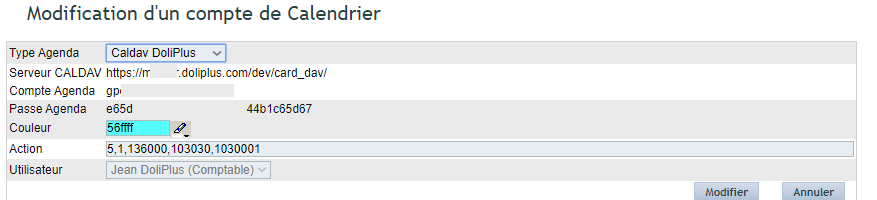
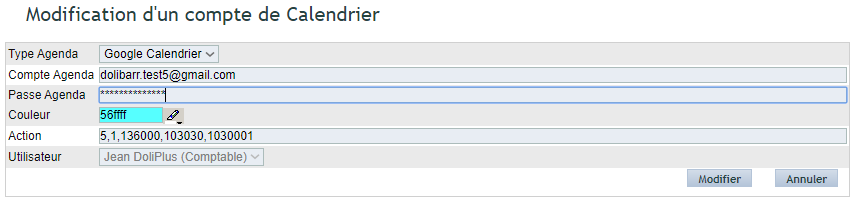
A filter on the “Action” field defines the action codes to synchronise (see the naming table at the bottom of the page).
Separate the action codes with a comma, without spaces.
The first code sets the type of action created from the smartphone in two-way mode (see below).
Sharing
Click the “Calendar sharing” button.
Read-only shared calendars: you can grant read access to colleagues across the organisation.
Read-write shared calendars: write access allows a colleague to open an event and edit it.
In the calendar, you then choose which shared calendars to display, in read-only mode. DoliPlus remembers this choice for the whole session.
Finally, you define the synchronisation window to keep response times fast. To do so, enter a number of days before (for example 3) and after (for example 30) the current day, in the “General settings” tab of the administration console.
Synchronisation with iOS and Android smartphones
DoliPlus offers two synchronisation modes. In addition, you can use them together.
DoliPlus synchronisation with the CalDAV open standard
Please note: recurring events are not synchronised yet. This will come in a future improvement.
DoliPlus configuration
First of all, DoliPlus hosts its own calendar server based on the CalDAV open standard.
iOS supports it natively. Android, on the other hand, requires a companion app available on the store.
In the configuration, choose exclusive use of the CalDAV standard.
Rule: an event created from the smartphone also lands in DoliPlus. It takes the first action type of the synchronisation list defined in the administration console.
For example, with the action codes 1,5 an event will be created as “1 – Phone call”.
Moreover, this calendar sits alongside the calendars already installed, transparently for the user. Its content stays independent from your other calendars. Therefore, you only need to enable it once on your phone.
Finally, select the “Caldav DoliPlus” mode in the configuration.
The administrator can view the credentials (URL, login and password) in edit mode. He can also send them by email from the user card, with the “Calendar credentials” button.
Please note: the trailing “/” in the CalDAV server URL matters!
Synchronisation window: go to the calendar configuration space -> “General settings” tab, then adjust the “DoliPlus CalDAV sync period”.
Android configuration
Several apps exist on the market.
For example:
- DAVx⁵ – CalDAV/CardDAV, the recommended 2-in-1 solution for both the address book and the calendar:
- (paid, on the Google store): https://play.google.com/store/apps/details?id=at.bitfire.davdroid
- (free, on the F-Droid store, version >= 2.5.4): https://f-droid.org/en/packages/at.bitfire.davdroid/
DAVx⁵ configuration: fill in the requested information with the settings provided.
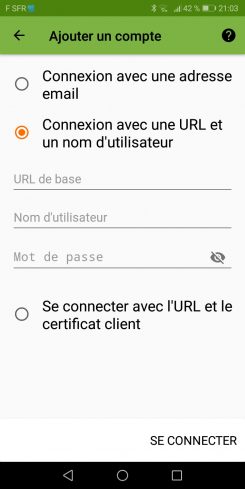
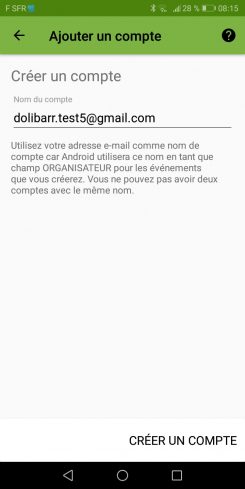
DoliPlus then uses the email account of the user.
Next, you see the calendar accounts available for reading.
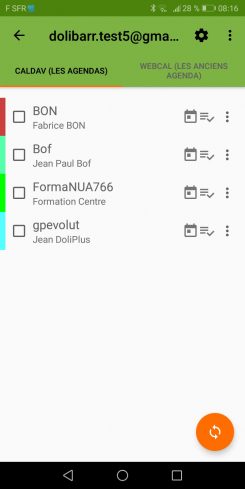
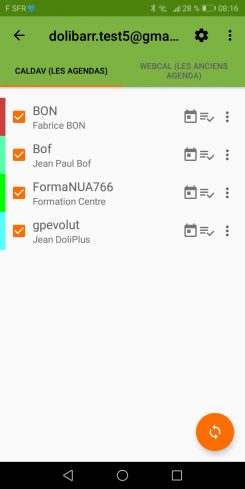
To enable synchronisation, first tick the accounts.
Then start the synchronisation with the orange button at the bottom. To refresh the accounts, simply pull the page downwards.
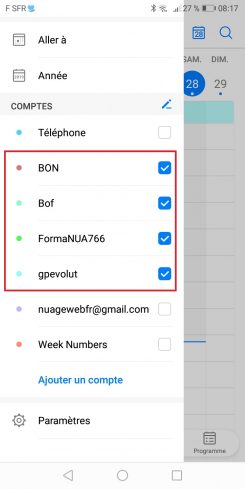
In the phone calendar, you then enable and display these accounts.
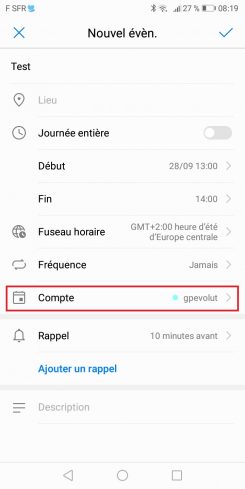
To add an event from the phone, choose the desired calendar account.
Battery usage on Android
Like any app, Android limits background battery usage, which affects updates here.
A message warns you about this when you install the app.
Therefore, allow this app to use the battery in your device settings. You will usually find this option in the “Battery” section of the device configuration.
Otherwise, your calendar will mostly update through manual synchronisation, from DAVx⁵, with the orange icon at the bottom of the page.
iOS configuration
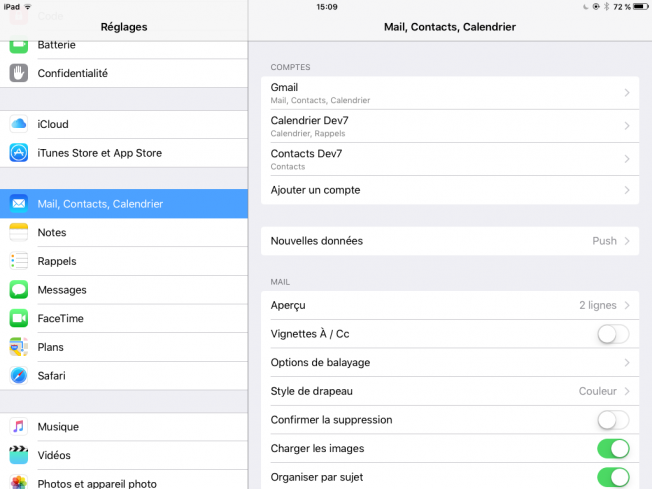
- Go to Settings on your iPhone or iPad.
- Tap Passwords & Accounts.
- Tap Add Account under Accounts.
- Tap Other.
- Tap Add CalDAV Account.
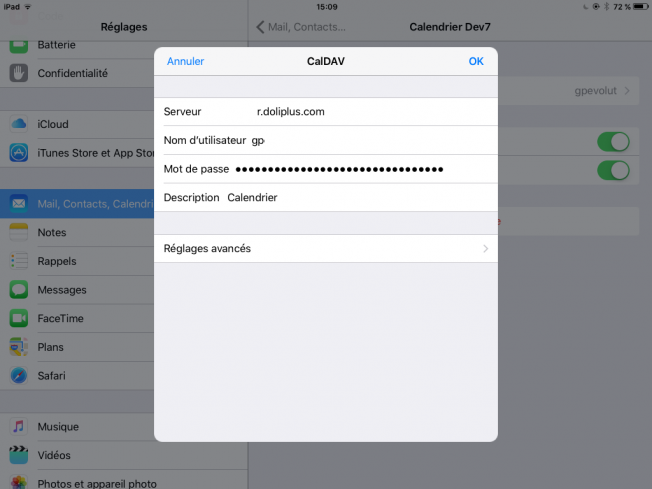
- Enter the following details for your account: Server: the calendar server URL provided; User name: your login; Password: the password provided; Description: give it a name so you can recognise it easily.
- Tap Next in the top right corner to verify the account.
- Tap Save in the top right corner.
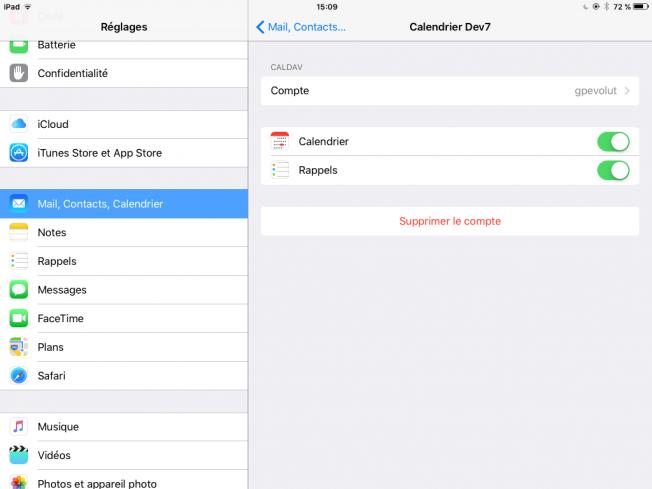
Your CalDAV account now starts synchronising with your iPhone or iPad.
Google Calendar synchronisation
Please note: Google has changed its policy, most likely for privacy reasons. It now blocks any new calendar account from registering for synchronisation.
Consequently, we will no longer maintain this link in the long run, even though it still works for existing accounts. Indeed, we prefer not to depend on a third party like Google for mobile replication. We invite you to use DoliPlusMobi instead.
Once enabled, this synchronisation creates a simple link to your DoliPlus calendar. Depending on the configuration, it also works both ways. Moreover, it remains compatible with Android and iOS phones.
To set it up, first choose the Google Calendar mode in the configuration. Then click the button in the “Auth.Google On/Off” column: the Google consent page opens.
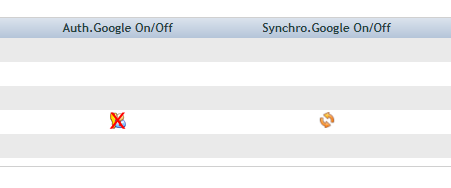
Enter the credentials of the account to synchronise — and no other.
Once the synchronisation is done, the same “Auth.Google On/Off” button revokes the consent.
The button in the “Synchro.Google On/Off” column enables the two-way mode (see below).
This is what a Google calendar looks like when synchronised from your DoliPlus.
The mode stays one-way by default. It switches to two-way as soon as “Synchro.Google On/Off” is enabled (green).
DoliPlus → Google
Google → DoliPlus (Synchro.Google On/Off)
The synchronisation works as follows:
- Only the action types defined per user in the administration console appear in the scheduling software.
- Your calendar mirrors the content of your Google calendar from the moment the configuration is completed.
- An action created in DoliPlus reaches Google immediately. It can then be edited on either side when the two-way mode is enabled.
To see a change made on the Google side, refresh your screen (or press F5).
Deleting the action in DoliPlus immediately deletes the Google action. Likewise, deleting it in Google or on the mobile device removes it in DoliPlus at the next screen refresh.
Rule: an event created directly in Google Calendar also lands in DoliPlus. It takes the first action type of the synchronisation list. For example, “1,5” gives “1 – Phone call”.
How the scheduling software works with other DoliPlus modules
Indeed, other modules take advantage of the team scheduling software and its graphical planning view.
Built-in email — DoliPlus webmail
To add an event invitation received by email to the calendar, see this chapter.
Production module
The production module displays manufacturing orders in the planning view.
Service and maintenance module
This module also uses the planning tool to schedule technician jobs.
Project module
Finally, this module links the time spent on an appointment to a project. An automatic hourly cost is then available in the project view, based on the information stored in the HR module.
Custom planning developments
Our team is available for any specific requirement — feel free to contact us.
Related Entrées
